
Taylor Test Kit Instructions: A Comprehensive Guide
This guide details using Taylor kits for accurate water analysis, referencing resources like Zeiss GPA manuals and digital imaging systems for precise measurements and reliable results.
Taylor Test Kits have long been a trusted standard for water quality analysis across diverse applications, from recreational pools and aquariums to crucial drinking water assessments. These kits empower users to independently monitor and maintain optimal water chemistry, ensuring safety and performance.
Drawing parallels to precise instrumentation like the Zeiss Mastering GPA, Taylor kits offer a reliable, albeit chemical, method for quantifying water parameters. While digital systems such as the Green XTM provide advanced imaging, Taylor kits deliver accessible and cost-effective testing. Understanding the principles behind these kits, as outlined in various manuals and resources, is key to achieving accurate results and proactive water management.
Understanding Water Chemistry Basics
Effective water testing relies on grasping fundamental chemical principles. Parameters like pH, alkalinity, and hardness significantly impact water’s usability and the effectiveness of sanitizers. Imbalances can lead to corrosion, scaling, or unsafe conditions, mirroring the importance of accurate measurements in fields like medical diagnostics – akin to the precision found in systems like Green XTM.
Taylor kits measure these parameters through chemical reactions that produce color changes, indicating concentration levels. Understanding concepts like titration, as seen in alkalinity tests, and the influence of calcium hardness, is crucial. Resources detailing sulfate and sulfite measurements highlight the breadth of water chemistry, demanding a solid foundational knowledge for accurate interpretation, much like understanding the Olympic Charter’s rules.
Types of Taylor Test Kits Available
Taylor offers a diverse range of test kits tailored to specific needs. Kits for Pool & Spa Water Testing focus on chlorine, pH, alkalinity, and calcium hardness – vital for recreational water safety. Freshwater Aquarium Testing kits assess ammonia, nitrite, nitrate, and pH, crucial for aquatic life. Saltwater Aquarium Testing expands on this, including salinity and specific gravity measurements.
For potable water analysis, Kits for Drinking Water Testing evaluate parameters like hardness, iron, and bacteria. The variety mirrors the specialized imaging capabilities of systems like the Green XTM, offering targeted analysis. Just as Zeiss GPA manuals guide specific testing, each Taylor kit provides reagents and instructions for its designated application, ensuring accurate results.
Kits for Pool & Spa Water Testing
Taylor’s pool and spa kits are designed for comprehensive water balance. They typically include tests for Free and Total Chlorine, ensuring effective sanitation. pH levels are critical, impacting swimmer comfort and disinfectant efficacy. Alkalinity testing stabilizes pH, preventing fluctuations. Calcium Hardness measurements protect pool surfaces from corrosion or scaling.
Furthermore, many kits include Cyanuric Acid (Stabilizer) testing, protecting chlorine from sunlight degradation. These kits, much like detailed instruction manuals for complex systems like the Green XTM, provide clear procedures and color comparators for accurate readings. Maintaining these parameters, guided by Taylor’s kits, ensures a safe and enjoyable swimming experience.
Kits for Freshwater Aquarium Testing
Taylor’s freshwater aquarium kits focus on establishing a stable and healthy aquatic environment. Essential tests include pH, crucial for fish and plant health, and Alkalinity, buffering pH swings. Ammonia, Nitrite, and Nitrate levels are vital, reflecting the nitrogen cycle’s efficiency – a delicate balance.
These kits, similar to the precision demanded by Zeiss Mastering GPA instructions, allow aquarists to monitor water quality closely. Testing for Calcium and General Hardness is also important, especially for certain species. Accurate readings, achieved through Taylor’s color comparators, prevent stress and disease, mirroring the detailed analysis provided by advanced imaging systems.
Kits for Saltwater Aquarium Testing
Taylor’s saltwater aquarium kits address the unique demands of marine environments. Beyond standard pH and Alkalinity testing, these kits include crucial parameters like Salinity (specific gravity), essential for osmotic balance. Ammonia, Nitrite, and Nitrate remain vital, but require careful monitoring in sensitive reef systems.
Specialized tests for Calcium, Magnesium, and Phosphate are included, impacting coral growth and overall reef health. Like the detailed analysis found in resources such as Zeiss GPA manuals, these kits provide comprehensive data. Maintaining proper levels, using Taylor’s precise color comparisons, is paramount, mirroring the accuracy of digital imaging systems for optimal marine life.
Kits for Drinking Water Testing
Taylor’s drinking water test kits prioritize safety and compliance with water quality standards. These kits typically assess parameters like pH, Hardness, Iron, Copper, and Lead – contaminants impacting health and aesthetics. Testing for Nitrate and Nitrite is also crucial, particularly for well water sources.
Similar to the detailed chemical analyses described in resources referencing sulfate and sulfite measurement, Taylor kits offer reliable results. Understanding total hardness, measured in grains per gallon (gpg), is vital, echoing the precision of instruments like the Zeiss GPA. Regular testing, using clear color comparisons, ensures potable water, safeguarding public health and mirroring the rigor of professional water analysis.
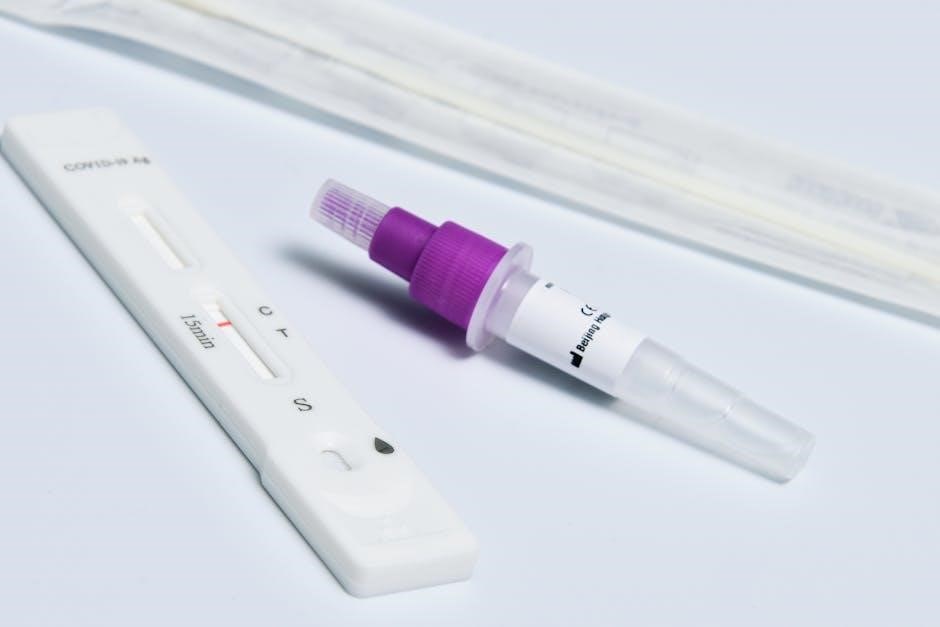
Components of a Typical Taylor Test Kit
A standard Taylor Test Kit comprises several key elements for accurate water analysis; These include precisely formulated Test Solution Bottles, containing reagents for specific parameters. Color Comparators, often utilizing a block or disc format, are essential for visually determining test results by matching sample colors to a chart.
Testing Tubes provide a contained environment for reactions, while a detailed Instruction Manual guides users through each step. The precision echoes the detailed instructions found in manuals for advanced imaging systems like Green XTM. These components, when used correctly, deliver reliable data, similar to the chemical test kits measuring sulfate and sulfite concentrations.
Test Solution Bottles
Taylor Test Kit’s reagent bottles are crucial, containing pre-measured chemicals for specific water parameter tests. These solutions, vital for accurate results, require careful handling and storage, mirroring the precision needed in systems like Zeiss Mastering GPA. Each bottle is clearly labeled with the test it performs and an expiration date – a critical detail for reliability.
Proper sealing is essential to prevent contamination and maintain reagent integrity. Like the sulfate and sulfite measurement kits, the accuracy relies on the solution’s purity. Discard any bottle showing signs of leakage or discoloration, and always follow the manual’s guidance for optimal performance and safe chemical handling.
Color Comparators
Taylor Test Kit color comparators are fundamental for visually determining water chemistry results. These devices present a spectrum of color standards, allowing users to match the color developed in the testing tube to a corresponding value. Similar to the advanced imaging in Green XTM systems, achieving a precise match is key to accurate readings.
Comparators come in various formats, including block-style and spinner versions. Proper lighting is crucial when using them, ensuring consistent and reliable color assessment. Regularly inspect the comparator for any damage or fading of the color standards, as this can compromise accuracy. Maintaining this component is as vital as reagent integrity for dependable water analysis.
Testing Tubes
Taylor Test Kit testing tubes are specifically designed to hold water samples during chemical reactions. Constructed from durable, chemically resistant materials, they ensure accurate and reliable test results. Like the precision required in Zeiss Mastering GPA analysis, maintaining the integrity of these tubes is paramount.
Before each use, thoroughly clean the tubes to remove any residue from previous tests. Rinse multiple times with distilled or deionized water to prevent cross-contamination. Inspect for cracks or chips, as damaged tubes can affect the accuracy of color development and subsequent readings. Proper handling and maintenance of these tubes are essential for consistent water quality assessment.
Instruction Manual
The Taylor Test Kit instruction manual is your primary resource for accurate water analysis. Similar to the detailed guidance found in a Zeiss Mastering GPA instruction manual, it provides step-by-step procedures for each test. Carefully review the manual before beginning, understanding specific reagent additions and timing requirements.

The manual details proper sample collection, lighting conditions, and interpretation of color charts. It also outlines safety precautions for handling chemicals, mirroring responsible practices in medical imaging like Green XTM systems. Refer to the manual for troubleshooting discrepancies and understanding kit expiration dates – crucial for reliable results. Always consult the manual for the most up-to-date procedures.
Preparing for Water Testing
Proper preparation is vital for accurate results, akin to the meticulous setup required for systems like the Green XTM digital imaging system. Begin by collecting a representative water sample, avoiding contamination and ensuring it reflects the overall water body.
Next, ensure adequate lighting; consistent illumination is crucial for accurate color comparison, much like clear imaging in radiographic procedures. Always verify the kit’s expiration date; expired reagents yield unreliable data. Refer to the instruction manual for specific preparation steps, mirroring the detailed guidance in manuals like the Zeiss GPA instructions. Thorough preparation minimizes errors and maximizes test accuracy.
Collecting a Representative Water Sample
Obtaining a truly representative sample is paramount, much like ensuring accurate data acquisition in advanced imaging systems such as the Green XTM. Avoid collecting near inlets, outlets, or disturbed areas.
Sample depth matters; collect from several depths and mix for a composite sample. Use clean, inert containers – avoid those that could leach chemicals. For pools and spas, collect from approximately 18 inches below the surface, away from return jets. Document the collection location and time. This meticulous approach, similar to the detailed protocols in the Zeiss GPA manual, ensures the test results accurately reflect the overall water quality.
Ensuring Proper Lighting Conditions
Accurate color matching is crucial for reliable results, mirroring the precision needed in digital imaging like CBCT scans from a Green XTM system. Avoid direct sunlight or strongly colored artificial light.
Diffuse, natural daylight is ideal. If using artificial light, opt for a neutral white source. Position the color comparator so light shines evenly across it, not directly into your eyes. Compare the sample color against the color chart consistently under the same lighting. Poor lighting can significantly alter color perception, leading to inaccurate readings. This attention to detail, akin to the meticulous standards in a Zeiss GPA manual, is vital for dependable water analysis.
Understanding Kit Expiration Dates
Taylor test kits, like any chemical reagent system – even advanced ones such as the Green XTM imaging system – have expiration dates. These dates guarantee the accuracy of the reagents. Expired reagents can yield false readings, compromising water quality assessment.
Always check the expiration date on each bottle before use. Do not use expired reagents. Expired reagents degrade over time, altering their chemical properties. Replacing them is essential for reliable results, similar to maintaining calibration in a Zeiss GPA instrument. Proper reagent management ensures consistent and trustworthy data, vital for informed decisions regarding water treatment or aquarium maintenance.
Performing Common Water Tests
Taylor kits facilitate several key water quality tests. These include determining free and total chlorine levels, crucial for sanitation, and assessing pH, impacting chemical balances. Alkalinity testing reveals buffering capacity, preventing drastic pH swings. Calcium hardness measurements are vital, especially for pools and aquariums, preventing scaling or corrosion.
Cyanuric acid (stabilizer) levels are also easily checked, protecting chlorine from sunlight degradation. Follow the instruction manual precisely for each test, utilizing the correct number of drops or reagent quantities. Accurate execution, much like the precision required in a digital imaging system, is paramount for reliable results and effective water management.
Testing for Free and Total Chlorine
Determining free chlorine (FC) reveals the active sanitizer, while total chlorine (TC) indicates both active and combined chlorine. Taylor kits employ a simple titration method; add reagent drops until a color change occurs, comparing it to the provided color comparator. Combined chlorine (CC) is calculated by subtracting FC from TC (CC = TC, FC).
High CC levels suggest excessive organic contamination, reducing sanitizing efficiency. Accurate FC and TC readings, akin to the precision of a Zeiss GPA analysis, are essential for maintaining safe and healthy water. Always follow the kit’s instructions regarding reagent volumes and mixing times for optimal results and reliable water balance.
Testing for pH Levels
pH measurement is crucial for water balance, impacting sanitizer effectiveness and preventing corrosion. Taylor kits utilize indicator solutions that change color based on acidity or alkalinity. Add the specified number of reagent drops to a water sample, then compare the resulting hue against the color comparator chart.
Ideal pH ranges typically fall between 7.2 and 7.8. Maintaining this range, similar to the precision needed in digital imaging systems like Green XTM, ensures optimal water quality. Deviations can lead to scale formation or etching. Accurate pH testing, following kit instructions meticulously, is vital for a comfortable and safe aquatic environment.
Testing for Alkalinity
Alkalinity acts as a pH buffer, resisting drastic changes in water chemistry – a stable foundation, much like the programmatic committee ensuring research integrity. Taylor kits employ indicator solutions, requiring a specific number of reagent drops added to the water sample. The resulting color is then matched to the kit’s comparator chart.
Ideal alkalinity levels generally range from 80 to 120 ppm (parts per million). Maintaining this range prevents corrosion and scaling, mirroring the precision of Zeiss GPA measurements. Low alkalinity causes pH bounce, while high alkalinity can lead to cloudy water. Consistent alkalinity testing, guided by the manual, is essential for balanced water.
Testing for Calcium Hardness
Calcium hardness measures the concentration of calcium and magnesium ions, crucial for preventing corrosion, similar to the structural integrity assessed by digital imaging systems like Green XTM. Taylor kits utilize a titration method, adding reagent drops until a color change occurs. This change signifies the endpoint, requiring careful observation and comparison to the provided color chart.
Optimal calcium hardness typically falls between 200-400 ppm; Low levels can cause etching of plaster surfaces, while high levels lead to scaling. Accurate testing, following the instruction manual, ensures proper water balance, much like the precision demanded in Olympic regulations. Consistent monitoring prevents costly damage and maintains water clarity.
Testing for Cyanuric Acid (Stabilizer)
Cyanuric acid (CYA) protects chlorine from sunlight degradation, extending its effectiveness – a principle akin to the protective measures outlined in athlete declarations. Taylor kits employ a colorimetric method, reacting CYA with reagents to produce a pink hue. The intensity of the pink color, compared against the kit’s color comparator, determines CYA concentration.
Ideal CYA levels range from 30-50 ppm for pools. Too little CYA results in rapid chlorine loss, while excessive amounts reduce chlorine’s sanitizing power. Regular testing, guided by the instruction manual, is vital for maintaining optimal water chemistry, mirroring the precision needed in Zeiss GPA measurements. Proper CYA levels ensure efficient sanitation.
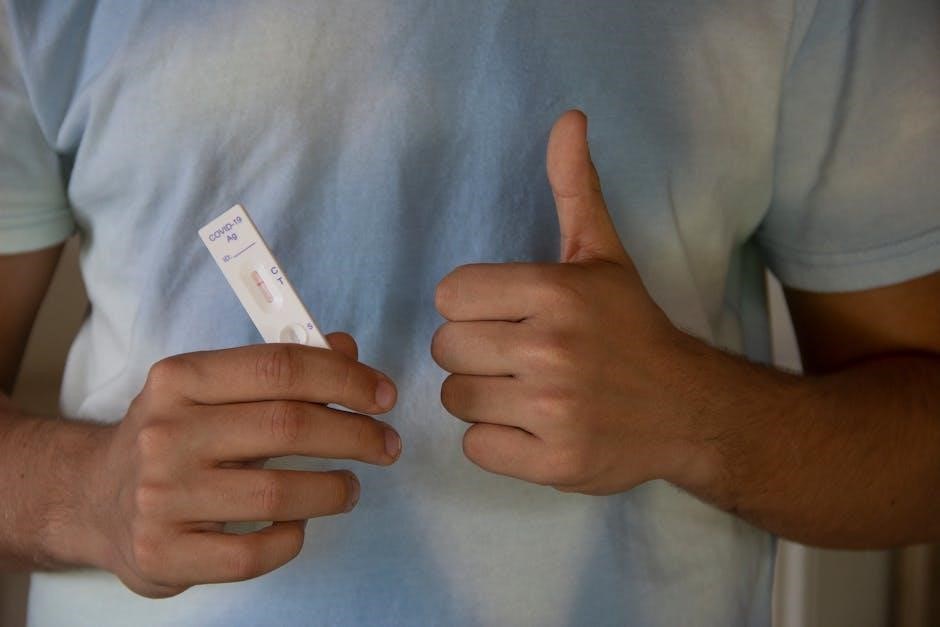
Interpreting Test Results
Accurate interpretation is crucial, much like deciphering data from advanced imaging systems like Green XTM. Taylor kits utilize color charts; matching the test sample’s color to the chart reveals the water parameter level. Understanding ideal ranges is key: pH should be 7.2-7.8, chlorine 1-3 ppm, and alkalinity 80-120 ppm – similar to precise measurements in water hardness testing.
Discrepancies may arise from expired reagents or improper testing technique. Re-testing with fresh reagents and careful adherence to the instruction manual often resolves issues. Consistent monitoring and logging results, akin to athlete performance tracking, allows for proactive water balance adjustments and optimal water quality.
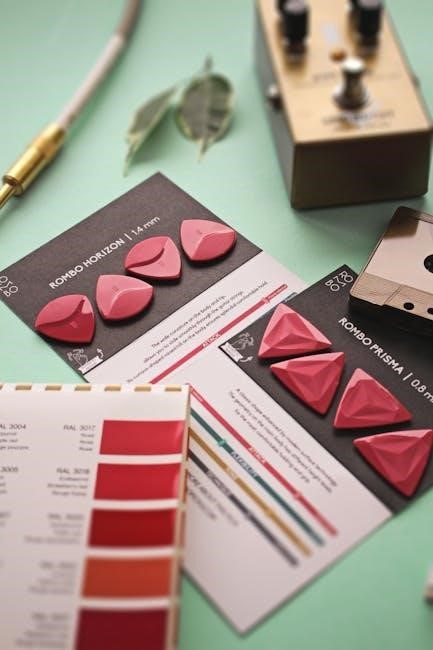
Understanding Color Charts
Taylor color charts are the core of result interpretation, functioning similarly to the visual analysis required in Zeiss GPA instructions. Each chart represents a specific parameter – pH, chlorine, alkalinity – with a gradient of colors corresponding to concentration levels. Accurate color matching is vital; view the sample against a white background under consistent lighting.
Slight variations in shade can significantly alter readings, demanding careful observation. Consider potential color interference from water clarity or background reflections. Charts are calibrated for specific kits and reagents; using the wrong chart yields inaccurate results. Practice and familiarity improve interpretation skills, mirroring expertise gained through manual study.
Recognizing Ideal Water Parameter Ranges
Optimal water chemistry varies based on application, much like precise measurements detailed in Zeiss GPA manuals. For pools and spas, a pH of 7.2-7.8, alkalinity of 80-120 ppm, and free chlorine of 1-3 ppm are generally ideal. Aquariums require different ranges; freshwater typically prefers pH 6.5-7.5, while saltwater systems demand stability.
Drinking water standards are governed by regulations, ensuring safety and potability. Understanding these ranges is crucial for maintaining water balance and preventing issues like corrosion, scaling, or algae growth. Regular testing with a Taylor kit allows proactive adjustments, mirroring the consistent monitoring needed for accurate imaging systems.
Troubleshooting Discrepancies in Results
Inconsistent Taylor test results require investigation, similar to diagnosing issues in advanced imaging like Green XTM systems. First, verify reagent freshness – expired solutions yield inaccurate readings. Ensure proper sample collection and lighting conditions, as described in the kit’s manual.
Double-check the color comparison against the chart, minimizing subjective interpretation. If discrepancies persist, repeat the test with a fresh sample and reagents. Consider external factors like recent chemical additions or heavy water usage. Referencing multiple tests can confirm anomalies, much like cross-validation in scientific analysis.
Maintaining and Storing Your Taylor Test Kit
Proper kit maintenance ensures accurate, long-lasting results, akin to the meticulous care required for Zeiss GPA instruments. After each use, thoroughly rinse testing tubes and comparators with distilled water to prevent cross-contamination. Store reagents in a cool, dark place, away from direct sunlight and extreme temperatures, mirroring best practices for sensitive chemicals.
Regularly inspect bottles for leaks or damage and replace any compromised containers. Discard expired reagents promptly – their accuracy diminishes over time. Keep the instruction manual accessible for quick reference. A well-maintained kit, like a calibrated imaging system, delivers reliable performance.
Cleaning Testing Tubes and Comparators
Maintaining pristine cleanliness of testing tubes and color comparators is crucial for accurate readings, much like ensuring a clear lens in a Zeiss imaging system. Immediately after each test, rinse tubes thoroughly with distilled or deionized water to remove all traces of reagents. Avoid using abrasive cleaners or scrub brushes, as these can scratch the surfaces and affect color perception.
For stubborn residue, a mild detergent solution followed by a thorough rinse is acceptable. Inspect comparators regularly for any staining or discoloration and clean gently with a soft cloth. Allow all components to air dry completely before storing, preventing mold or mildew growth. Proper cleaning ensures reliable results every time.
Proper Storage of Test Solution Bottles
Maintaining the integrity of Taylor test solution bottles is paramount for accurate results, akin to the careful handling of reagents in specialized chemical tests; Store bottles in a cool, dark, and dry location, away from direct sunlight and extreme temperatures. Avoid storing near potential contaminants or sources of fumes. Ensure caps are tightly sealed after each use to prevent evaporation and maintain reagent concentration.
Do not return used reagent drops to the original bottle to avoid contamination. Keep bottles upright to prevent leakage. Regularly inspect bottles for signs of deterioration or leakage, and replace any compromised reagents. Proper storage extends reagent life and ensures reliable testing.

Replacing Expired Reagents
Expired reagents compromise the accuracy of Taylor test kits, much like outdated calibration in advanced imaging systems impacts results. Always check expiration dates before performing any tests. Discard any reagent past its expiration date – do not attempt to use it, as results will be unreliable. Obtain replacement reagents directly from Taylor Technologies or an authorized distributor to ensure compatibility and quality.
When replacing reagents, carefully note the specific type and quantity needed for your kit. Properly dispose of expired reagents according to local regulations. Maintaining a stock of frequently used reagents can prevent testing delays. Regularly updating reagents is crucial for consistent and dependable water analysis.

Safety Precautions When Using Taylor Test Kits
Taylor test kits utilize chemicals that require careful handling. Always prioritize safety during water testing. Avoid direct contact of reagents with skin and eyes; wear appropriate protective gear like gloves and eye protection. Work in a well-ventilated area to minimize inhalation of fumes. Never mix reagents unless specifically instructed by the kit’s instructions – unintended reactions can be hazardous.
Keep test kits out of reach of children and pets. Properly dispose of used reagents according to local environmental regulations. If contact occurs, immediately flush the affected area with plenty of water and seek medical attention if irritation persists. Treat all reagents as potentially harmful and exercise caution.
Handling Chemicals Safely
Taylor test kits contain chemicals demanding strict adherence to safety protocols. Always read and understand the instruction manual before commencing any test. Wear chemical-resistant gloves to prevent skin absorption and potential irritation. Eye protection, such as safety glasses or goggles, is crucial to shield against splashes. Avoid inhaling reagent fumes – work in a well-ventilated space or use a fume hood.
Never pipette by mouth; utilize a pipette bulb or automatic pipette. Do not return used reagents to their original containers to prevent contamination. If spills occur, clean them immediately with appropriate absorbent materials. Store chemicals in a cool, dry place, away from direct sunlight and incompatible substances.
Avoiding Eye and Skin Contact
Taylor test kit reagents can cause irritation upon contact with eyes and skin. Prioritize preventative measures during testing. Always wear appropriate personal protective equipment (PPE), including safety glasses or goggles, to create a barrier against splashes. Chemical-resistant gloves are essential to prevent skin absorption of potentially harmful substances.
If accidental eye contact occurs, immediately flush with copious amounts of water for at least 15 minutes and seek medical attention. For skin contact, wash the affected area thoroughly with soap and water. Avoid rubbing the eyes or touching your face while handling reagents. Prompt action minimizes potential damage and ensures a safe testing experience.
Proper Disposal of Used Reagents
Responsible disposal of used Taylor test kit reagents is crucial for environmental protection and safety. Do not pour reagents down the drain or into waterways, as they can contaminate water sources. Consult local regulations regarding hazardous waste disposal, as guidelines vary by location;
Small volumes of neutralized reagents may be diluted with a large amount of water and carefully disposed of. Larger volumes or concentrated solutions should be collected in labeled, sealed containers and taken to a designated hazardous waste collection facility. Never mix different reagents together before disposal, as this could create dangerous reactions. Prioritize environmentally sound practices to minimize impact.